ReactJS library has been in the market for a very long time and we all are very much aware of its power. We all know how we can build UIs using ReactJS, create components, and much more. If you don't know about React there are tons of free resources available online that you can use.
In this blog, we will study about Wing and how you can create a React app connected to Wing backend.
Wing is the world's first cloud-programming language that runs on cloud services. Wing allows the developers to easily build and deploy the cloud applications. Wing makes it possible to write both infrastructure code (terraform) and application code in a single model.
Wing comes with a standard library "cloud" having an "Api" method. Api method represents the collection of HTTP endpoints that can be invoked by the clients over the internet. This Api method can be used to create an API that can serve as a backend API to store and fetch data.
You can play around with the Winglang language and understand it’s working in the playground feature.
Let's create a React app that will be connected to an API created using Wing.
Installation
Install the Wing Toolchain in your device. Make sure you have Node.js 18.13.0 or higher version in your device. To install Wing Toolchain, run this command in your device -
npm install -g winglang
Install the Wing VS code extension present on the VS Code marketplace.
You can check the version of the installed Wing CLI:
wing --version
Creating Project
Create the project directory in your filesystem and give it your desired name. Open this directory in the VS Code. Create a directory named backend in the project directory.
Create a file named “main.w” in the backend directory and paste the following code in it:
bring cloud;

let queue = new cloud.Queue();
let bucket = new cloud.Bucket();
let counter = new cloud.Counter();

queue.setConsumer(inflight (body: str): void => {
  let next = counter.inc();
  let key = "key-{next}";
  bucket.put(key, body);
});
Note: In case you get stuck anywhere in the whole process, we suggest you to join our Slack Channel
Run the Wing toolchain locally to check it’s working as per the expectations. Run this command in your terminal:
wing run backend/main.w
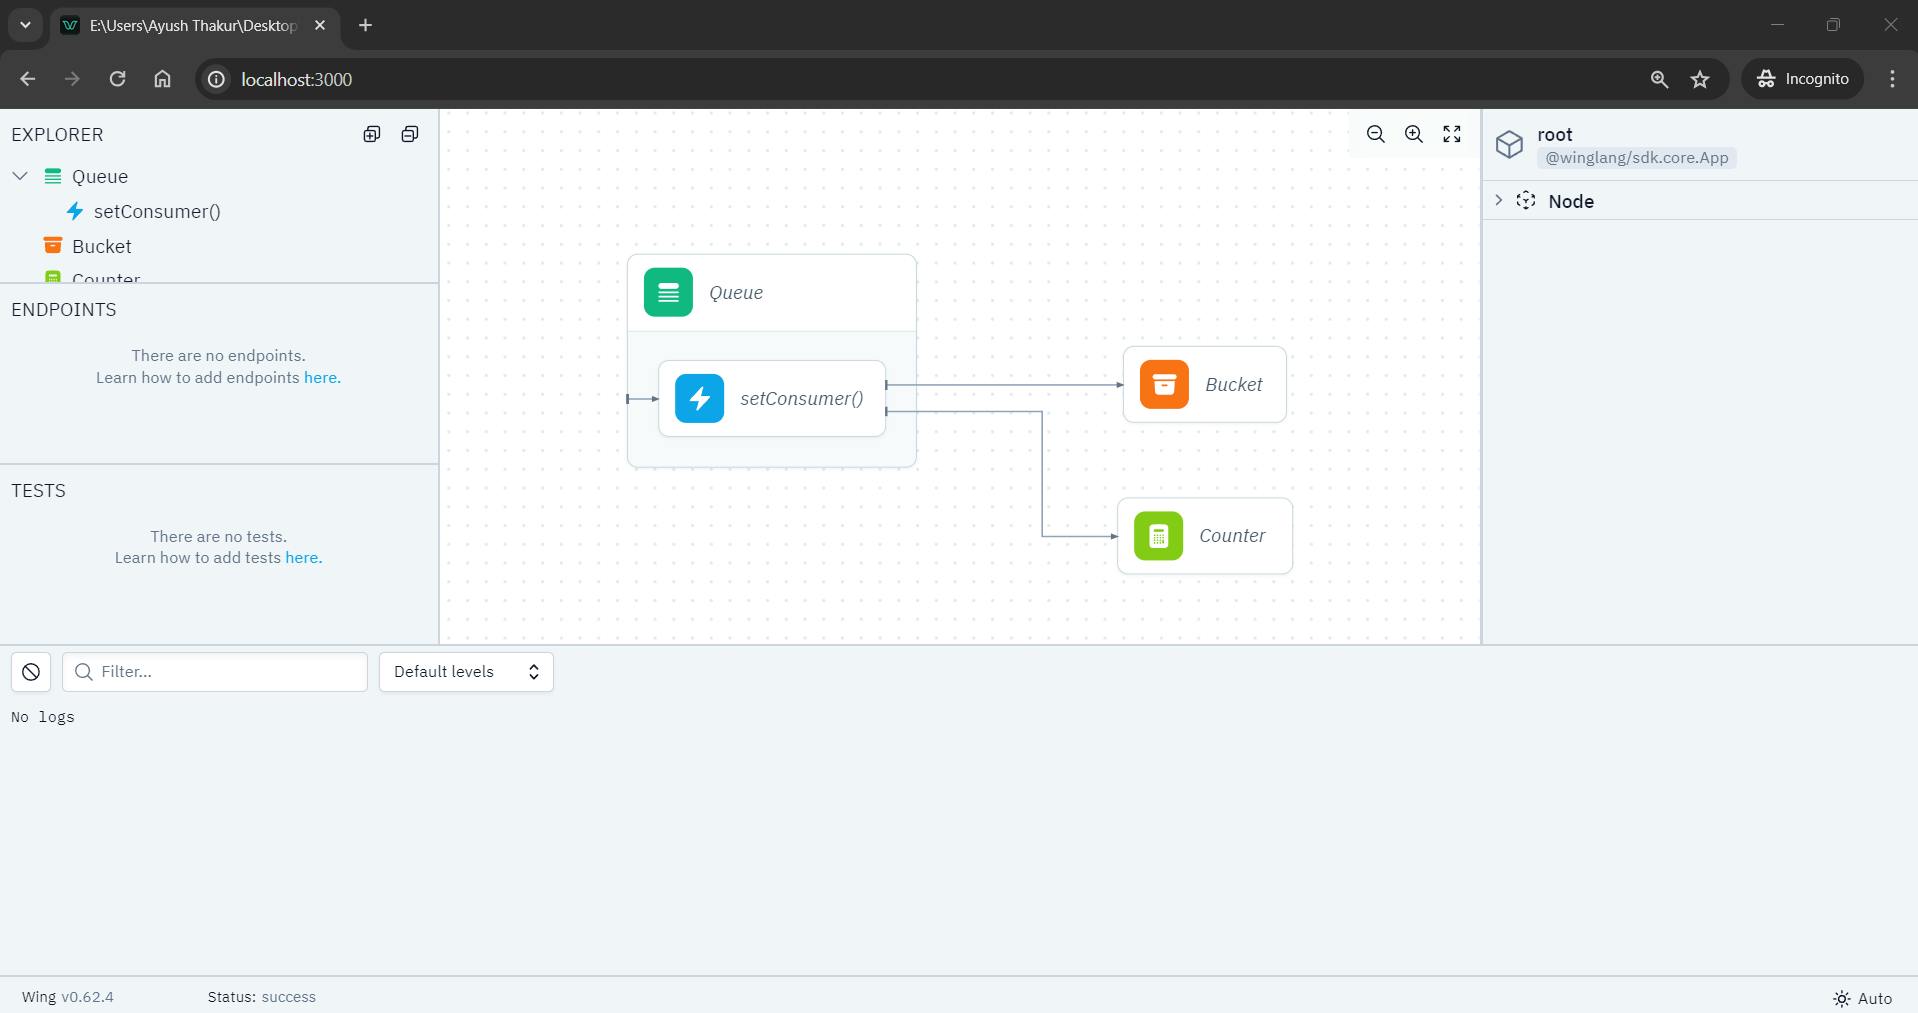
Output display will be:

This is the Wing Console that works as a simulator where you can try, test, and experiment with the cloud application to see if it is working properly or not.
Creating React App
Now let’s create a React App that will serve as the frontend and then connect it to the Wing backend we have created.
We will use the create-react-app to create the React App in your project directory. Make sure you are inside the main project directory, and not inside the backend directory.
Open a new terminal and run these commands:
npx create-react-app client
cd client
npm i --save @babel/plugin-proposal-private-property-in-object
npm start
Once you see the React App successfully running, you can close the server with CTRL+C
Connecting Wing backend
Now, we will connect the Wing backend to our React app. It will allow us to fetch data from the Wing backend and display it on the user interface.
Open backend/main.w file and replace its content with this:
For Windows:
bring ex;
bring cloud;
let react = new ex.ReactApp(
    useBuildCommand: true,
    projectPath: "../client",
    buildCommand: "npm run start",
    );
For Linux:
bring ex;
bring cloud;

let react = new ex.ReactApp(
  projectPath: "../client",
);
Terminate your running terminal where wing run is running with CTRL+C and again run it with the setting BROWSER=none environment variable:
For Windows:
set BROWSER=none
wing run backend/main.w
For Linux/Mac:
BROWSER=none wing run backend/main.w
BROWSER=none will restrict React to open a new browser window on every run.
Now, you have a React app successfully running connected to the Wing toolchain backend.
Pass Configuration from Backend to Frontend
Wing generates a wing.js file in client/public/wing.js that passes the configuration from the Wing backend to the frontend code.
This file’s current content will have:
// This file is generated by Wing
window.wingEnv = {};
add the following code to backend/main.w:
react.addEnvironment("key1", "value1");
The running wing run will add this key-value pair to the client/public/wing.js:
// This file is generated by wing
window.wingEnv = {
    "key1": "value1"
  };
Now, you need to link your frontend code to the wing.js file. Copy and Paste the following code in the client/public/index.html file, above the <title> tag:
<script src="./wing.js"></script>
We will fetch the title from the backend and display it in the React app. Replace the “Learn React” (present around line 18) string with the following code in the client/src/App.js file:
{window.wingEnv.title || "Learn React"}
This expression displays the title dynamically fetched from the wingEnv object in the React app. If the wingEnv object doesn't have a title property or if the value of window.wingEnv.title is falsy, it will show the default title 'Learn React' instead.
Go back to backend/main.w and add this code:
react.addEnvironment("title", "Learn React with Wing");
This will add the title key in holding Learn React with Wing message in the wing.js file.
Fetch Title from backend
Now we know how we can pass parameters (data) to the backend from the client. We can use this practice to set the window.wingEnv.apiUrl on the client and fetch the title from the backend.
We need to enable the cross-origin resource sharing (CORS) by adding the following code in backend/main.w file:
let api = new cloud.Api(
    cors: true
  );
To set the apiUrl, go to the backend/main.w and add:
react.addEnvironment("apiUrl", api.url);
This will add the apiUrl key and the current URL of the backend API to the main.w file.
Create a /title route in the backend API. Add this code to the backend/main.w file:
api.get("/title", inflight () => {
    return {
      status: 200,
      body: "Hello from the API"
    };
  });
When a GET request is made to the ‘/tite’ endpoint, the server will respond with the HTTP status code 200 and the message “Hello from the API”
You can change this body message as per your desire.
Replace the following code with the content present in client/src/App.js:
import logo from './logo.svg';
import { useEffect, useState } from "react";
import './App.css';

function App() {
  const [title, setTitle] = useState("Default Value");
  const getTitle = async () => {
    const response = await fetch(`${window.wingEnv.apiUrl}/title`);
    setTitle(await response.text());
  }
  useEffect(() => {
    getTitle();
  }, []);
  return (
    <div className="App">
      <header className="App-header">
        <img src={logo} className="App-logo" alt="logo" />
        {title}
      </header>
    </div>
  );
}
export default App;
Here, we are using fetch method to fetch the title from the backend API, useState and useEffect hooks are used to store the fetched title in the title variable.
Final output will be:

And congratulations! you have successfully created a React app that is fetching data from the Wing toolchain backend.
That’s how you can store the data in the Winglang backend and fetch it to display it on the frontend UI.
Got stuck anywhere? Do check out our video tutorial where we have practically explained the whole process:
